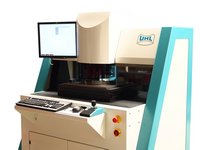
Here you will find a list of new products we have added to our program:
VMM150V
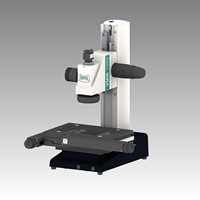
Valuable and solid video measuring microscope with brilliant telecentric optics and optimized illumination system.
• telecentric optical system
• easily exchangable objektives with extra long working distance
• measuring stage with quick-release and fine-adjustment or motorized axes
• smooth-running coaxial coarse and fine focus drive
• stable aluminium cast stand
• integrated stepless coaxial incident and transimitted LED light, 4-segments LED ring light
• high resolution digital video camera
| Measuring stage | Movement range X / Y / Z (mm) | Options / Accessories |
| hand driven | 200 x 100 x 150 | • digital readout QC3000 • z-measurement • measuring software VMS, OMS, Metlogix M3 |
| motorized | 200 x 100 x 150 | • z-measurement • measuring software OMS, IMS Metlogix M3 |
![]() VMM150 brochure download...
VMM150 brochure download...![]() VMM100/150 system diagram download...
VMM100/150 system diagram download...
Video Measuring Machine MS5
Complete video measuring machine in portal design with highest precision.
All components are integrated in the instrument.
Configurable according to customer requirements.
Instrument details see -> MS5
Video-Kamera FLZ-CAM und FLZ-CAMA
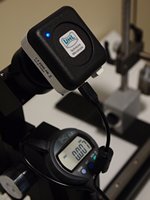
Digital cameras for wireless transmission of the spit-field image from the eye-piece of our Alignment Tester FLZ.
FLZ-CAM: 1/3 "camera with eyepiece adapter, 1.3-megapixel, wireless image transfer via WiFi interface to Windows, Android or iOS devices.
FLZ-CAMA: see above, built-in rechargeable battery.
Further informations:
see -> Alignment Tester FLZ
Camera adaptor MS1-MFT and MS1-CX
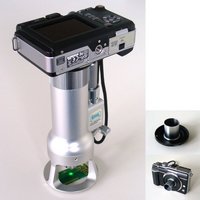 For attachment of digital system cameras to our portable measuring microscope MS1.
MS1-MFT: Adaptor C-Mount to „Micro Four Thirds“ bayonet, for Olympus and Panasonic system cameras with MFT sensor (Olympus EP and OM-D, Panasonic Lumix DMC-G).
MS1-CX: Adaptor C-Mount to „Nikon 1“ bayonet, suitable for Nikon system cameras with CX-sensor (series S, J, V and AW).
Further information:
see -> Measuring Microscope MS1
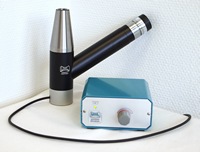
Machine Centring Microscope MZM
 |
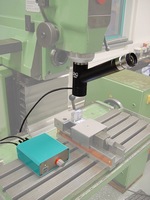 |
Universal centring microscope to set up tool machines (for example milling or drilling machines).
The edges of a workpiece can be positioned, rotary stages can be centered or machine spindles can be aligned. The centring microscope is fixed in the machine instead of the tool.
• the image is true erect and with high contrast
• the eyepiece has a graticule with crosshair and concentric circles
• LEDs are used for the incident light
• 5 µm centring accuracy can be achieved
• DIN 2080-A 40 (short taper) standard fixture
• different fixtures and draw bolt upon request
| Vergrößerung | Bildfeld | Messbereich | Auflösung |
| 30x | 5 mm | - | - |


